May 31, 2010

Memorial Day

 
Thank you all of you who have served in America's armed forces.

"The story of America's quest for freedom is inscribed on her history in the blood of her patriots."--Randy Vader

Memorial weekend in America is a time to honor our men and women in the armed forces and all that they have done for this country. It is a time to pay respects with visitations to and flowers on graves and much television is dedicated to them and their wars. It is also a time of get-togethers with friends and family, also the beginning of summer and outdoor events. It was a beautiful weekend.

Here are some cool things I made, acquired or saw on this memorial weekend...
 I made the French collage, melted French wine bottle, lavender display for a French theme party.

 Way cool recycled pedestal serving plate my very dear friend made for me.

A creative card I purchased from auntpeelscrafts.


 Nature beginning its colorful cycle. Catmint at the arboretum.

 Eurasian Eagle Owl named Malachi at the arboretum. Check out those eyes!

  
"As we express our gratitude, we must never forget that the highest appreciation is not to utter words, but to live by them."--John F Kennedy

May 28, 2010

mini bookshelf

A very cool antique find! I just love these books, they are the size of 3" x 4". From a collection called "Little Leather Library", it was founded in 1916. There were five different editions, of those only the first two were leather. The books I acquired were type 4, published 1920-1924. These books are worn, faux leather cover, brown pages on the inside, starting to rot, and they have an old musty smell. I love it!

I made a little bookshelf, as I ended up with 17 of these books. First, I used recycled cardboard and cut and shaped into a box, the size 6" length x 5" height, x 3 1/4" deep. I then covered the whole thing with old looking scrapbook paper, using modge podge as the adhesive. Next, I curled some copper wire into an edging around the front, for a decorative finish. I attached the copper with hot glue. Lastly, I filled with the books.


Some of the authors I got were Browning, Burns, Dumas, Emerson, Lincoln, Plato, Shakespeare, Tennyson, Thoreau, Washington, Wilde, Yeats.

May 25, 2010

recycled wine bottle #2

More reused bottles! In the kiln for 12-16 hours to melt. I used copper wire for hangers. they look cool together or in a grouping. On a wall or in a window. The nice thing about wine bottles are all the different shades from clear to amber to brown to green.

For another wine bottle project, click here.

"WARNING: The consumption of wine may cause you to tell your friends over & over again that you love them."

May 24, 2010

recycled beer bottles

Here are more reused bottles. In the kiln for 14 hours to melt and slump. Then this time, I decided to decorate with a mixture of paper and paint, with simple shapes. I love the stark brown bottle and the decorative paper is a nice contrast on it. I used a glass primer before I attached anything. I then used paint under the paper and a little on top for that "distressed" sort of look, then coated the top with a glass sealer. 

"WARNING: the consumption of beer may cause you to think you can sing."

May 21, 2010

envelops

I love to send and receive snail mail. Envelops come in all shapes and sizes and colors. It is fun to make them and give them away in a card or through the mail as art. Here are a couple different ones I made.
 These are made of wax. You need two pieces of wax paper, put your embellishments between and then iron between two tea towels. Once stuck together, fold and glue to close.
A standard way to make an envelop.
  1. Lay a regular-sized piece of paper of any color on a flat surface in front of you so that it is horizontal.
  2. Fold it up horizontally until the edges are flush at the top of the paper, and crease the fold.
  3. Unfold the paper, and bring the bottom right-hand side corner up, stopping at the middle of the paper at the crease.
  4. Bring the top corner down, stopping at the crease.
  5. Fold up the left side of the paper, stopping at the bottom of the triangle you have made, and crease the fold.
  6. Glue the top and bottom on the left-hand side with a glue stick to seal the sides of the envelope.
  7. Place your letter inside the envelope, and fold over the triangle end to close the envelope.
  8. Use the glue stick to seal the envelope shut.
     
    Make an envelop out of a map!


    This is a mini envelop, about 1" x 1 1/2", made from a standard post it note.
    Or just decorate with markers, drawings, quotes, stickers.

    Put your objects in the envelop, put return address, send to address and a stamp. The smallest size an envelop can be in 5" x 3 1/2". Also, 44 cent stamp for up to 1 oz. Happy mailing!

today's entry goes with my stationery thought, check it out...

May 20, 2010

container garden

Here's a way to garden even if you live in an apartment or townhouse, like me. This year I planted tomatoes and herbs, as well as some flowers. Keep in mind with containers, they usually need more water than plants in the ground. I water daily simply using my watering can with water from the sink (this is a relaxing routine). My edibles are against an east facing wall, that seems to work best for me and the flowers are on both against east and west facing walls. I love to watch the transformation as the season goes on. Here are beginning photos...

tomatoes, lavender, oregano, sunflower sprouts, marigolds
basil, thyme, cilantro, butterfly bushes, more marigolds
sunflower sprouts
more flowers, marigolds and pansies


"Gardening is about enjoying the smell of things growing in the soil, getting dirty without feeling guilty, and generally taking the time to soak up a little peace and serenity."--Lindley Karstens

May 18, 2010

genealogy

I have been researching and collecting family history for about 18 years now. One of my aunts and I laugh at the thought of actually getting "caught up" or finishing anything. There is always new information coming in or pictures that emerge from some random source or "stuff" put aside because you can't read or understand it and "will get back to later". It is all so interesting, yet what to do to organize... Do you have old photos that are stacked in a drawer or a box somewhere? Here's a starting point, a simple way to preserve some family history. Take decorative pages (buy or cut) that are standard 8 1/2" x 11" size for a three ring binder. Purchase sheet protectors of the same size, the initial cost for this size is less expensive than scrapbook projects or anything custom made. Write or obtain information- stories that you've been told or a memory you have of the person (you could also use pedigree charts or family lists for this). Then place then correct photo with the written words. One or two photos per page is nice. You can make it to your liking, the possibilities are endless! My aunt has made books for each of her children. Here are some of my pages.

May 16, 2010

recycled maps

Got an outdated atlas in your car? An old torn road map from a vacation? Got rolls of maps in the closet? Instead of tossing them or just letting them sit around, reuse them. Here are a few ideas to get started.
1- gift wrap or make hang tags for presents
2- cut our certain parts and put on a card or scrapbook with it
3- use as a backdrop or canvas to an art project or collage
4- use as a book cover to your school books or journal
5-make envelops

"All you need is the plan, the road map, and the courage to press on to your destination."--Earl Nightingale

May 13, 2010

photo albums

Photography is one of my favorite hobbies, I love to take photos of the sights in my view or of my people. I like to organize my photos in sort of smaller type theme books. I have found some albums that I like and will use, but I have come up with one I created that is my favorite. I have over 20 of these and have made some for gifts. They look really cool on the bookshelf with all the many colors I use.

This is a fairly simple book to bind. I start out with a piece of thick paper, usually water color paper. I cut into an approximate 7 1/2" x 12" rectangle. Using acrylic paint, I coat one side with two or three colors, one as a base and the others with a pattern or sponge. Once dry, I give a coat of modge podge, so it will not scratch. Then I fold in half, punch a hole about an inch from each end on the fold. Figure out how many pages are needed for the inside and use card stock, about 5" x 7" size pre-made cards. On the fold of each card, punch holes about 3/4" from top and bottom, this measurement is not exact, you need to make sure they line up with outside cover. Once everything is aligned, get a piece of matching ribbon or cord that will bind the book together. I start the ribbon from the outside and go in the holes, cross over, then out the holes and cross, then in again and tie into a knot. You could also tie on the inside, just start opposite. To attach my pictures, I use "photo squares", as they are archival.

the cover

the center, where the ribbon crosses


another page

 various colors
 
the bookself


"A good snapshot keeps a moment from running away."--Eudora Welty

May 9, 2010

recycled mothers day cards

HAPPY MOTHERS DAY!

"A mother is a person who seeing there are only four pieces of pie for five people, promptly announces she never did care for pie."--Tenneva Jordan


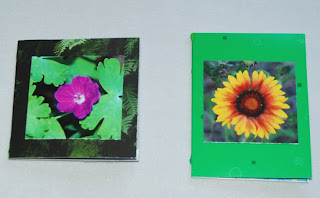
Here are a couple of cards I made this year. They are made out of recycled tissue boxes and cardboard. The photos I took and attached to outside, the inside I glued colored paper scraps.

May 7, 2010

reuse canning jars


What to do with a canning jar? 
1-       drink your coffee or juice out of it 
2-       make your favorite preserve 
3-       decorate it, fill it with homemade candy, fudge or mini cookies and give as a gift 
4-       fill with potpourri, cover top with a decorative material instead of lid and smell 
5-       use it as a coin bank 
6-       use it as a pen, pencil, marker holder 
7-       use it to hold water to rinse off your paintbrushes 
8-       store nails, tacks, brads, beads, thread, etc. 
9-       put colorful seasonal candy in it for display (candy corn) 
10-   fill with dry ingredients of a favorite treat, put a recipe & bow on it, give as a gift 
11-   steal these ideas, I did

May 6, 2010

The Art of Tea

To "take tea" is the act of making and drinking tea that forces us to slow down. Drinking tea is a ritual. Put water on to boil. Pick out a tea cup and saucer. Prepare tea, cream, sugar and food, if you like. Then waiting for the tea to steep. Finally, relax, enjoy and be in your moment.

The daily routine of it can vary. Tea is something to share with a friend over conversation. It can be a tea party with a few loved ones, potluck style. You provide tea, someone bring scones, another tea sandwiches. It can be a quiet time to yourself with a book or journal. It can also be a time to formulate creative thoughts into a new project. Absorption and reflection are important to brain activity and production. Stop and take tea and see what happens.
 Some of my tea cup and saucers.


These two old tea cups were my great grandmothers. The lace doily behind them, my mother made.

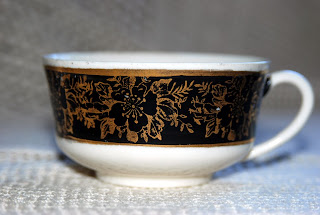
This is my favorite tea cup right now.

"Strange how a teapot can represent at the same time the comforts of solitude and the pleasures of company."--Anonymous